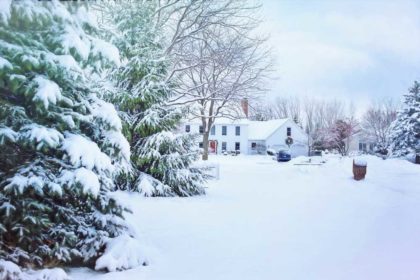
Winter will be here before we know it, which means it’s time to prepare your home for the cool months ahead. A little preparation now will help keep your home running smoothly as winter storms and cold weather approaches. Here are 10 steps to prepare your home for winter.
- Check smoke and carbon monoxide detectors.
With more wood fires and heater use, this is a great time to make sure your smoke and carbon monoxide detectors are working properly. Test and replace the batteries as needed and set a reminder on your phone to check them each month. Friendly reminder, your units need to be replaced after 10 years, so replace units as needed. - Check and replace your furnace filters if needed.
You can check with your furnace manufacturer to find out exactly what maintenance your system requires. However, a good rule of thumb is to check and replace your HVAC filters every 90-days. If your HVAC unit has not been professionally serviced in a while, this is the time to schedule an appointment to ensure your unit is in tip-top shape for the cold months ahead! - Have your chimney cleaned.
Before you light the first fire of the season, have your chimney cleaned by a certified professional. Regular cleaning is a necessary safety measure for wood burning fireplaces and wood stoves. Over time, creosote can build up in your chimney which increases the risk of a house fire. Gas fireplaces should also be inspected – even through gas is a clean-burning fuel, there could be other debris blocking the chimney. - Protect pipes from freezing temperatures.
Because water expands as it freezes, frozen pipes can burst which leads to extensive water damage and costly repairs. Thankfully, there are a few steps you can take to reduce the risk of this happening in your home.
Start by removing any attached hoses and store them inside for the winter to prevent cracking, preserve their shape, and prolong their life. If possible, shut off any exterior faucets and drain water from outdoor pipes, valves, and sprinkler heads to protect against a pipe burst. Insulate any other exposed, outdoor pipes and faucets. Additionally, make sure your family knows where your water shut-off valve is so anyone can turn the water off quickly, if needed. - Make sure water is draining away from your home.
On the next rainy day, take a walk around your home to ensure water is draining away from your home. Cracks can form in your foundation when water seeps in and freezes. If you notice any water near your foundation, use sandbags to temporarily keep the water away. Plan for some outdoor work on the next dry day or in the spring to fix whatever is causing water to settle near your home. - Make sure your gutters and downspouts are draining properly and not overflowing.
While you’re checking your home for proper water drainage, look up to see how your gutters are holding up. On the next dry day, clean gutters of any debris and make sure downspouts extend away from the house to avoid water build up around the foundation. You may need to repeat this if your home has a lot of trees around it. Ensure your gutters and downspouts are properly fastened and not loose or sagging, repair as needed. Check out our guide on How to Clean your Gutters for more information. - Inspect your roof before the rain hits.
On the next dry day, check for missing, damaged, or warped shingles and replace before you get stuck with a leak. Also check for deteriorated flashing at the chimney, walls, skylights, and around vent pipes. Seal joints where water could penetrate using roofing cement and a caulking gun. - Stop cold air from getting in.
Feel a cold breeze in your home? Act as soon as you notice the problem before temperatures drop even more. Check and repair caulking around doors and windows. Be sure you use the right type of (paintable) caulking. Consider adding weather-stripping around the frames of windows and doors to keep heat in and cold air out. Additionally, we would suggest closing your foundation vents to help keep the warm heat inside your home. - Check the perimeter of your home for vegetation.
Do a quick walk around your home and make sure no vegetation is touching your siding. This is the leading cause of exterior wood rot. Trim any overgrown branches to prevent iced-over or wind-swept branches from causing property damage. Also clean up any leaves, dirt, and pine needles from the perimeter of your home, as well as fences and decks to prevent mold and mildew growth. - Test outdoor lights and replace bulbs as needed.
As the days get shorter, we rely more on exterior lighting for safety and ambiance. Ensure all lights are working properly and clean webs and dust from the fixtures. Also consider adding a timer to your exterior lights so they automatically turn off and on. It’s a small feature we think every homeowner should have!
We hope this helps you feel better prepared as we head into the cooler, winter months! If you find anything you have questions about, feel free to give our office a call.